Don’t you just love the taste of fresh strawberries? If you have never had a strawberry directly out of the patch you do not know what you are missing. They are so sweet and delectable… just .. .YUMMY!
You know what I hate? Squirrels… particularly squirrels eating MY STRAWBERRIES! Last year I had a lot of success hiding them in amongst my chives, garlic and onions… but weeding the patch was a nightmare. I wanted to put something together that was a bit more defensible. Ergo… I want to tell you today how to make a raised strawberry bed.
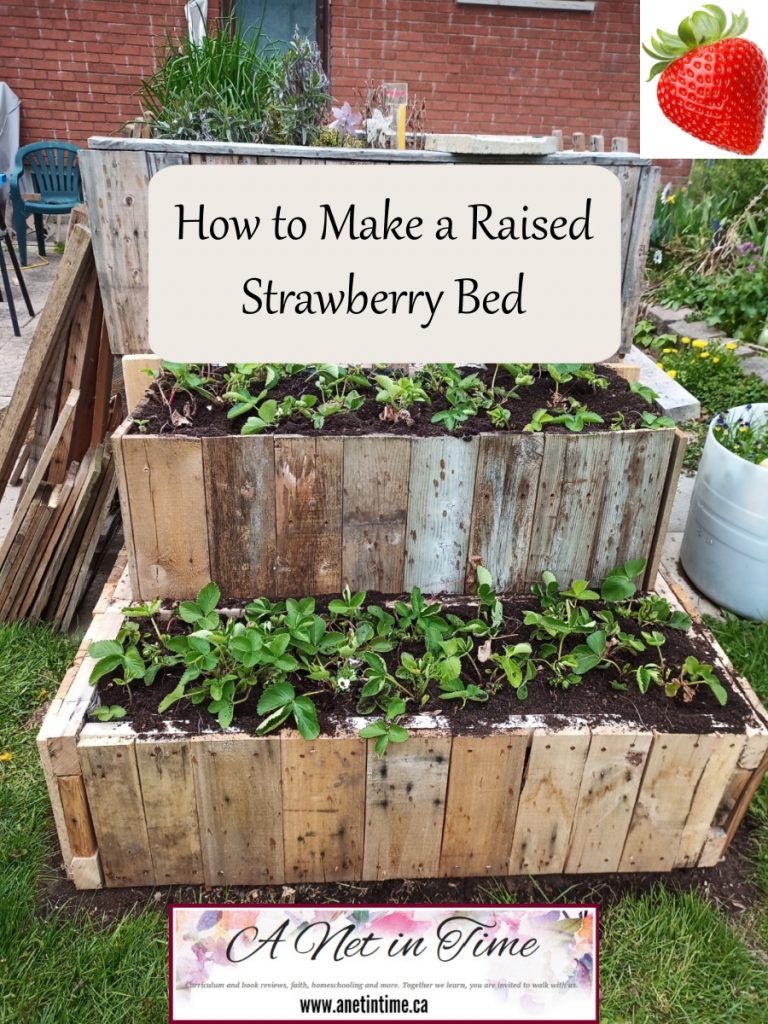
First, you need to figure out a place to put them. Last year I put in a herb garden to keep my hubby happy. It worked tremendously well and our Lizzie cat soon discovered it was a great place to watch for vermin to chase. The squirrels avoided it, ergo… strawberry bed attached??? It is also in the full sun which strawberries adore. I talked it over with my fellow and he agreed, good place for a strawberry bed.
We laid the footing. The patio stones are 24 x 24 and we picked them up last year for free from a guy who just wanted them gone for the price of labour of removing them. It was hard work for the lad and I, but well worth it. Finding ways to have my teen help me in the garden is always a good thing.
I love working with raised garden beds. It makes it so much easier to work individual sections of a bed which reduces the pressure to get it all done. I find it easier to weed, easier to section off growing areas, and much easier to water.

Mock it Out
If you are less of a planner and more of a wing it person you don’t want to miss the “mock it out stage”. This is where you put your wood and check out what your project will look like.
This gives you a chance to see if you basic idea is even going to work. Does the wood you have fit the space planned? And you can better see at what height you need to cut the wood. I continued this process as I worked my way through this project. I was determined to do it all on my own if I could.

How to Make a Raised Strawberry Bed
I’m … not a fan of power tools. I have this tendency to not always pay the closest attention to what I’m doing and using hand tools reduces my risk of severe injury. So I measured twice… and occasionally three times to mitigate the need to make any more cuts than I needed. I followed my mock out.
Needed supplies
Handsaw, screws, scrap lumber, staple gun with staples, saw horses, old lining from pond, filler, compost, good dirt.

Second Stage
Building stage two took a bit more working to be honest. I hadn’t originally planned on building it the way I did, but hubby made a couple of suggestions and I thought them decent. Just so you know, to build it I used scrap lumber we had lying around. Wood from pallets and some from an old privacy fence. Lumber is a bit expensive right now so it’s good to make do with what you have at hand.
Stage two took a lot more fitting together to make it work. I built the sides to fit to the height of where the herb garden stopped. This part was super easy! I just chose wood that was all the same width and ended when I was about halfway. The longer part was more difficult and actually resulted in me putting wood into a clamp on hubby’s work table to cut and inch off the width, length-wise. GAH… that was a challenge!

I lined it all with old pond liner. I learned that our small stapler is called a T150! 🙂 Knowing this makes it a whole lot easier to order staples when stores are in lockdown. The Liner means I won’t have soil leaking out of the bottom. Since it’s all bits and pieces I didn’t have to worry about it becoming water logged.

Once the liner was in I put a broken (accidentally!) fountain in the bottom. My sister gave me a fountain water feature for our pond last year. They had upgraded and thought I could make use of the old one. Bad planning/timing/footing caused it to fall unexpectedly and it shattered. I put it to good use anyways. I would have rather had the pond feature but one uses what one has at hand eh? As I planned out how to make a raised strawberry bed I wanted to do so as cost-effectively as possible.
Next, I filled my strawberry bed with compost. All the way up to the top, and finished off with a thin layer of dirt. Letting it settle with rain. Compost always needs to settle before you plant it. Strawberries love a good loamy, well draining soil so putting compost down and then adding the best soil ever from my garden. The worms will break down the compost and mix in the added dirt and before you know it the whole thing will be filled completely with the best soil ever! 🙂

What makes my garden dirt the best dirt around? Using compost that it predominately rabbit manure gives me a soil that is rich in worms and nutrients. My garden grows well. I suppose you could say that everything I grow is organic. I used to sell most of my rabbit manure. It was a lot of work with people liking to complain or leaving a huge mess when they came to get it. I decided I’d rather use it all and/or share with friends than deal with that aspect of customer service.

A nice week of rain settled the compost and dirt 4 inches so I topped it up to a bit overflowing. Planted my strawberries. And now… they flower! 🙂 It does my heart good just like spending time outside is good for well-being. Want to know something else that’s good? Saving money!
SchoolhouseTeachers.com is having a sale right now (affiliate link). Use the code OUTSIDE to save!


Normally I would nip off the flower buds so my plants get stronger and fruit more profusely next year, but my patch has been operational for the past three years. All I’ve done is replant them so it’s good to see them flowering which means they have recovered nicely.
When the strawberries start to fruit I’m going to place hoops over them and cover them with netting. This way I can get into them, but the squirrels will hopefully be held off.
I hope this post has helped you know how to make a raised strawberry bed of your own. Just choose a nice sunny location and use good loamy, well-draining soil and you too can have strawberries that you can protect from the squirrels. 🙂
Looking for ways to use your strawberries? Or needing to buy some tools? Check out my affiliate links to Amazon.





It looks great. Hope you get lots of yummy strawberries out of the plants this year.
Oh, I hope so too! 🙂