• Skip to secondary menu
  • Skip to main content
  • Skip to primary sidebar
  • Skip to footer
  • Home
  • About Me
    • Privacy Policy
    • Disclaimer, Legal and Media Kit
  • Blog
  • Contact me

A Net in Time

Curriculum and book reviews, faith, homeschooling and more!

  • Art
  • Blogging Helps
  • Faith
  • Homeschooling
  • Poetry
  • Recipes
  • Reviews
  • Writing

bread

Simple Whole Wheat Bread

April 7, 2018 By Annette1 1 Comment

EVEN THOUGH this recipe for Simple Whole Wheat Bread is way more complicated than most of the bread recipes I make… we REALLY like this bread and ergo it’s become one I’ve made FOUR TIMES in the last three weeks!   Can you believe it!!!!  I use it for loaves, buns, and cheesy dinner rolls… the lads are in love!  You’ll find the original recipe here.   As with anything I made a couple of slight modifications.

simple whole wheat bread

Ingredients

3 cups warm water (110 degrees F/45 degrees C)
2 (.25 ounce) packages active dry yeast   For me this is 5 tsps
1/3 cup honey
5 cups bread flour
3 tablespoons  veggie oil
1/3 cup honey
1 tablespoon salt
3 1/2 cups whole wheat flour APPROXIMATELY.. usually four cups for me.
2 tablespoons butter, melted … sometimes I do this, more often I don’t.  We like a harder crust!

simple whole wheat bread cheesy dinner rolls

Directions

  1. In a large bowl, mix warm water, yeast, and 1/3 cup honey. Add 5 cups white bread flour, and stir to combine. Let set for 30 minutes, or until big and bubbly.
  2. Mix in 3 tablespoons veggie oil, 1/3 cup honey, and salt. Stir in 2 cups whole wheat flour. Flour a flat surface and knead with whole wheat flour until not real sticky – just pulling away from the counter, but still sticky to touch. This may take an additional 2 to 4 cups of whole wheat flour. Place in a greased bowl, turning once to coat the surface of the dough. Cover with a dishtowel. (see note) Let rise in a warm place until doubled.
  3. Punch down, and divide into 3 loaves. Place in greased 9 x 5 inch loaf pans, and allow to rise until dough has topped the pans by one inch.  I will often make one loaf, 6-8 buns, and then some dinner rolls with cheese.  
  4. Bake at 350 degrees F (175 degrees C) for 25 to 30 minutes; do not overbake. Lightly brush the tops of loaves with 2 tablespoons melted butter or margarine when done to prevent crust from getting hard. (I generally skip this step) Cool completely.

NOTE: I put my rising bread into my That’s a Bowl from Tupperware.  When the lid pops, the bread has risen.  Makes it super easy for me to remember to check on it. 

Another bread you might want to try is Multi-Grain Bread.

Filed Under: Recipes Tagged With: bread, recipes

Recipe: Sweet Rolls

April 25, 2017 By Annette1 2 Comments

 I had never made sweet rolls before so I thought I’d give it a whirl.  I chose this recipe as it looked quite doable in the course of one day and some looked too complicated for a first go round.    It made far more than I thought it would.  Next time I will need to make them in a 9 x 13 pan.  (instead of three small round pans).

Ingredients:

1/2 cup milk
1/2 cup  sugar
1 1/2 tsp salt (can get away with less)
1/4 cup butter, melted
1/2 c warm water
2 pkg dry yeast
2 large eggs, beaten
2 cups flour (first amount)
up to 2 1/2 cup flour
additional melted butter for brushing on tops of baked rolls.

Directions:
  1. Scald
    milk (bring just to a boil and remove from heat immediately.(1 minute in microwave works too) Stir in
    sugar, salt, and butter. Set aside and allow to cool to lukewarm.  
  2. In a large bowl mix warm water and yeast. Stir until dissolved. Stir in
    lukewarm milk mixture, beaten eggs, and half the flour. Beat until
    smooth.
  3. Add remaining flour gradually, mixing as you go. You may need a bit more
    or less than the total 4 1/2 cups called for in the recipe, depending
    on the humidity and other factors. Your dough should be elastic and
    slightly stiff but not dry.

  4. Turn dough out onto a floured board and knead until smooth and very elastic. This usually takes 8-10 minutes.
  5. Butter the inside of a large mixing bowl. Put dough in bowl and turn
    dough over a couple of times to coat it all with the butter.
  6. Cover bowl and place in a warm place so it can rise. It will take about
    1 hour to double in bulk. At that time punch dough down and turn out
    onto a lightly floured board to shape.

  7. Pinch off about 2-3 tablespoons of dough and shape into a ball. Place
    each one in a buttered muffin tin or baking pan, barely touching each
    other, do not crowd rolls.
  8. Cover prepared rolls and allow to rise in a warm place until doubled in
    bulk, again about 1 hour. Rolls should now touch each other. (A little
    more rising will occur during baking.)

  9. Preheat oven to 375 degrees when rolls are about 10 minutes from being ready for baking.
  10. When ready to bake place rolls in oven and bake for 20-25 minutes. They
    should be browned nicely and smell so good and yeasty! Brush tops of
    rolls with melted butter immediately when removed from oven. Allow rolls
    to set for at least 10-15 minutes before eating.

 NOTE: if you make a ring…cook it for less time they came out a bit dark being in as long as the rest of the rolls. 

This post may contain affiliate links – using affiliate links from A Net in Time helps fuel this blog and our homeschool – thank you!

©2006-2017 A Net In Time. All rights reserved. All text, photographs, artwork, and other content may not be reproduced or transmitted in any form without the written consent of the author. A Net In Time/

Filed Under: Uncategorized Tagged With: bread, hands-on learning, recipes

Recipe: Italian Bread

April 11, 2017 By Annette1 Leave a Comment

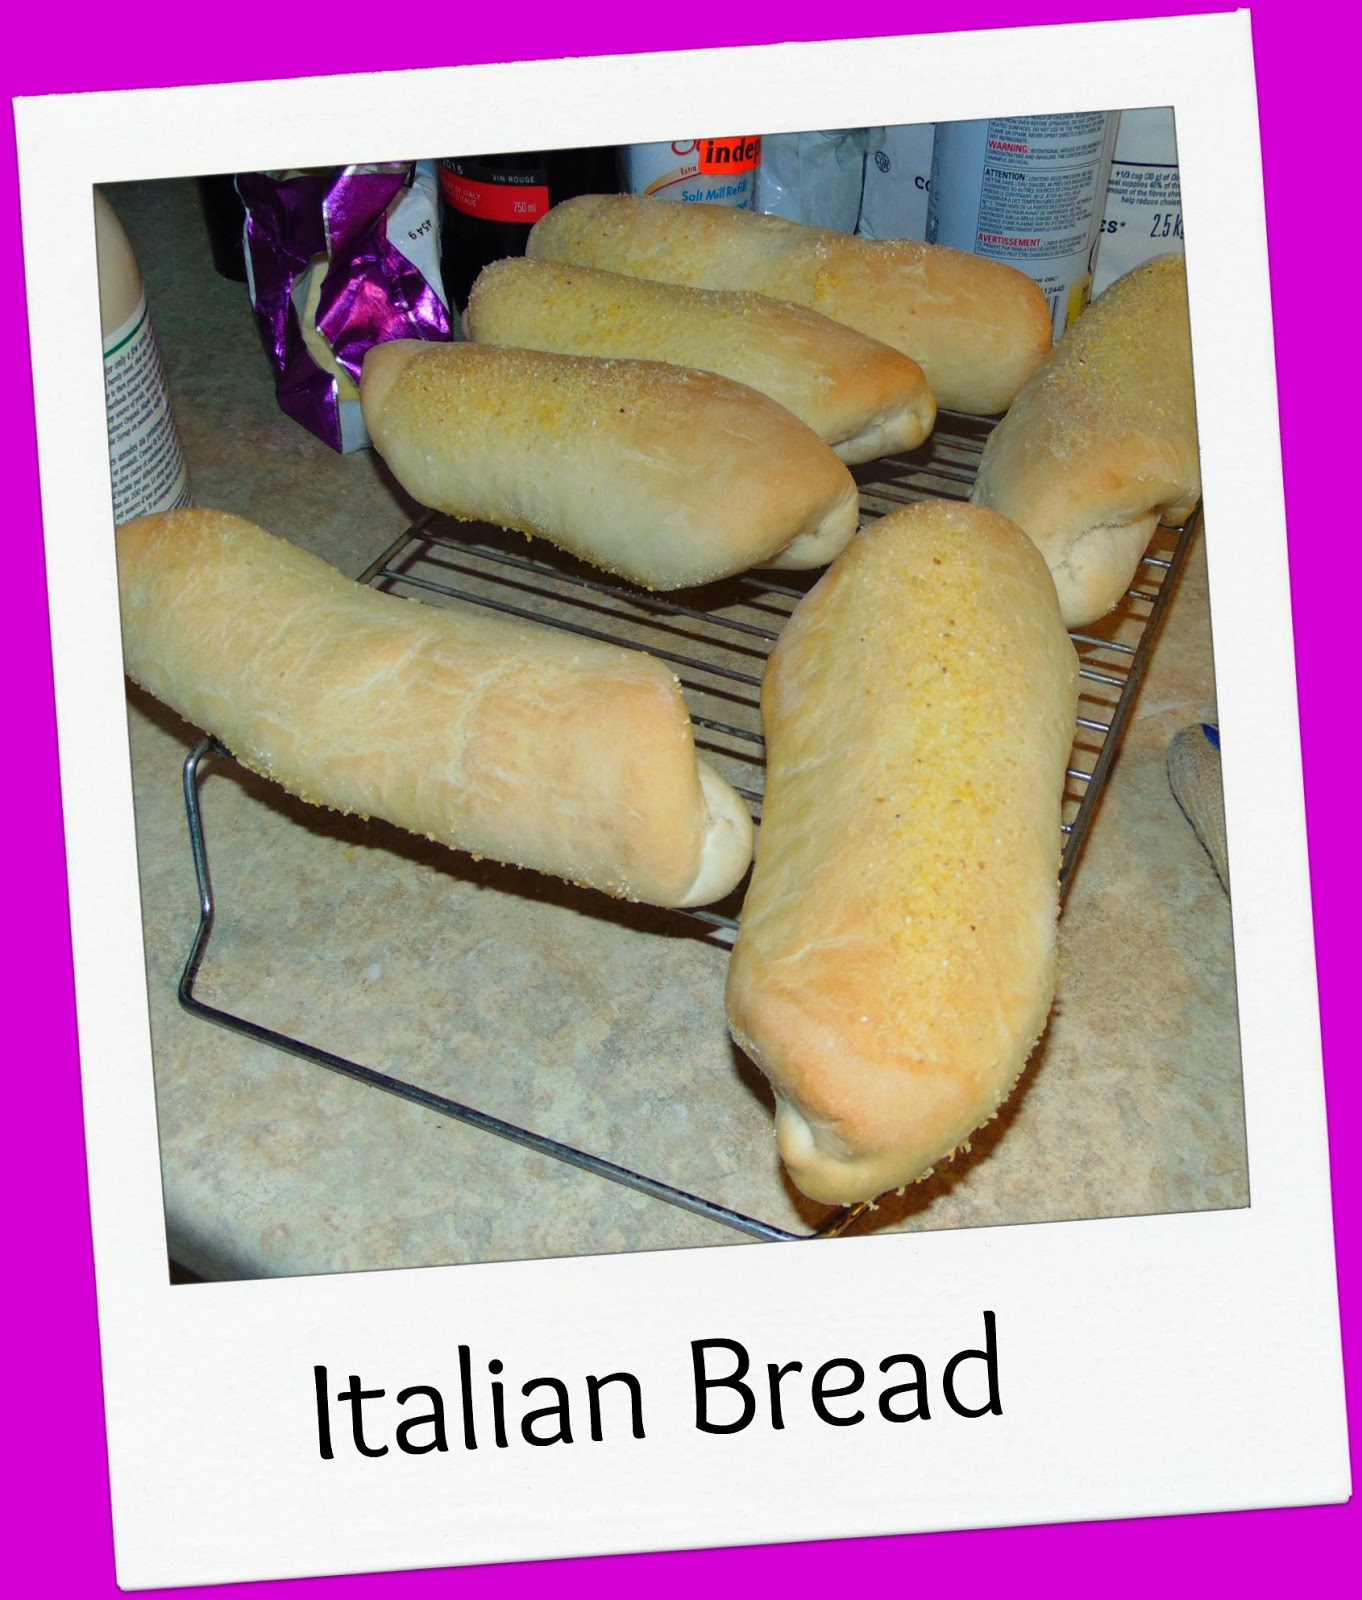
So either I missed something in this recipe or I did something COMPLETELY wrong, but this didn’t make the two loaves it said that it would, but rather made 12 small ones.   I will only be writing down the steps that I did as  I got rather confused by the end.  🙂

Ingredients

1.5 cups all-purpose flour
1 tablespoon sugar
2 teaspoons salt
5 teaspoons active dry yeast (2 packages )
1 tablespoon butter or 1 tablespoon margarine, softened
3/4 cup All purpose flour
1 3⁄4 cups very warm water (120 -130 F)
3-4 cups all purpose flour
cornmeal
peanut oil or light olive oil
 1 egg
1 tbsp cold water

Directions

  1. Preheat oven to 375
  2. In large bowl thoroughly mix 1 1/2 cups flour, sugar, salt and undissolved yeast.
  3. Add butter. (my butter was not soft so I cut into tiny blocks)
  4. Gradually add warm water to dry ingredients and beat 2 minutes with mixer at medium speed, scraping bowl occasionally.  Our mixer is kaput right now I used a whisk and just changed the speed at which I mixed it
  5. Add 3/4 cup flour.
  6. Beat at high speed for 2 minutes, scraping bowl occasionally.
  7. Stir in enough additional flour to make a stiff dough. Today I added 3 cups flour.
  8. Turn dough onto a lightly floured board and knead until smooth and elastic (about 8-10 minutes).   I found I Needed this whole time and added a bit more flour as I want.  You want a non-sticky dough.
  9. Cover dough with plastic wrap and then a towel and let it rest for 20 minutes.
  10. To make loaves: Divide dough in half.
  11. Roll each half into a 15×10 inch rectangle.
  12. Starting at wide side, roll up tightly; pinch seam to seal.
  13. Taper ends by rolling gently back and forth.  If you want two loaves STOP HERE!   Skip ahead to step 18.   SEE… I just figured out what I did wrong!   🙂
  14. To make rolls: Divide dough into 6 equal pieces.
  15. Roll each piece into a rectangle 8×5 inches.
  16. Starting with wide side, roll up tightly; pinch seam to seal.
  17. Taper ends.
  18. Place the shaped dough seam side down on greased baking sheets sprinkled with cornmeal.
  19. Brush dough with oil.
  20.  FROM HERE ON I DEVIATED from the original recipe
  21. Cover loosely with plastic wrap and refrigerate 2-24 hours.
  22. When ready to bake, remove from refrigerator and uncover carefully.
  23. Let dough stand at room temperature for 10 minutes.
  24. Make 3 or 4 diagonal slits in dough with a sharp knife or razor blade.
  25. Bake at 425°F for 15 minutes for rolls, 20 minutes for loaves.
  26. Remove from oven and brush with egg white beaten with cold water.
  27. Return to oven; bake 5-10 minutes longer, or until golden.
  28.  

What I did was NOT refrigerate the rolls.   I put some of them in the refrigerator just so they wouldn’t rise as I cooked the first batch.   I forgot to add the diagonal slits (my bad) and I baked them for about 15-20 minutes at 375.  I also forgot to brush them with egg white/water mix.   

I had trouble sealing the seams, but I’m guessing practice will make me better.

Result:
Me: When eaten directly out of the oven they taste like regular white bread.   BUT once they cool they taste like a loaf of Italian bread.    I like them.   I plan to use some tomorrow to make mini heated sandwiches.

The lad… “MOM!   These are too dry and crunchy.  They need to be eaten with honey or jam or something. I like the taste but mom,.. they are too dry!”   In his defence he’s never had Italian bread before in any other form than garlic bread.  🙂

For more bread recipes see below  

Traditional White Bread.
Irish brown soda bread.
Irresistible Irish soda bread. 
Amish White Bread. 
Pizza Bread. 
Python Dogs and Sun Bread. 
Kim’s White Bread, altered. 
Grandma VanDoren’s White Bread. 
Hamburger Buns. 
Buns for Thanksgiving.
Garlic and Cheese Breadsticks. 
Sweet Rolls. 
Scones. 
Scotch Scones. 
Whole Wheat Rolls and Buns.
Julia Child Sandwich Bread. 
Cheese Biscuits. 
Multi-grain, whole wheat bread. 
Tasty Buns.
 

Filed Under: Uncategorized Tagged With: bread, recipes

HomeMade Tortillas!

March 31, 2017 By Annette1 6 Comments

So guess what I made tonight!!!   I know, I know, you probably guessed it from the post title eh!  🙂       Homemade tortillas.      I’m telling you how much I like tortillas and have wanted to find a way to make them cheaper than buying them.  Hubby found this recipe for me…it is so easy and so yummy.  🙂

AND THEY TASTED GOOD!!!!

So here’s the recipe, it’s super simple.  Original recipe here.

Mix together Two cups flour, 1/2 tsp salt, 3/4 cup water and 3 tbsps of oil. 

Knead that mixture for a good 8 minutes, adding flour or water as needed to make a smooth elastic dough.
Let it rest for 10 minutes. 

Divide into 8 sections, roll each section out as thin as possible, a minimum 7 inch circle.

Cook over a medium burner on a non stick pan with cooking spray.   1 minute each side (you want them LIGHTLY browned).

Keep them warm.  Makes 8 servings.

Easy to make, tastes yummy too!  🙂

Tonight we used them wrapped around shredded beef with corn niblets.   MMMMM.. …  🙂
I can totally see cutting them into pieces and using them with a dip, or with mmmm.. melted cheese. 🙂

This post may contain affiliate links – using affiliate links from A Net in Time helps fuel this blog and our homeschool – thank you!

©2006-2017 A Net In Time. All rights reserved. All text, photographs, artwork, and other content may not be reproduced or transmitted in any form without the written consent of the author. A Net In Time/

Filed Under: Uncategorized Tagged With: bread, hands-on learning, recipes

Recipe: Tasty Buns

February 28, 2017 By Annette1 2 Comments

I really liked the dough in this recipe, hopefully they taste as good as the recipe was to make.   Just so you know… THEY DID!!!

Ingredients

  • 2 cups all-purpose flour(I used one whole wheat, one white)
  • 2 (.25 ounce) packages dry yeast 
  •  1/4 cup sugar
  • 1 tsp Salt
  • 1 cup milk
  • 3/4 cup water
  • 1/2 cup vegetable oil 
  •  2-3 cups all-purpose flour(I used one whole wheat and almost 2 white)
  • fine grated cheddar cheese

Directions

  1. Stir together 2 cups
    flour and the yeast, add in sugar
    and salt. In a separate bowl, heat milk, water, and oil heat to lukewarm in microwave.(in my microwave took 3 minutes). Add all at once to the flour mixture,
    and beat until smooth, about 3 minutes.  Use a mixer.
  2. Mix in enough flour to
    make a soft dough, 2 to 3 cups. Mix well. Dust a flat surface with
    flour, turn dough out onto floured surface, and let rest under bowl for
    about 10 minutes.  I kneaded it for a minute before letting it rest.
  3. Shape dough into 12 slightly flat balls, and place on greased baking sheet to rise until doubled in size.  Made enough for 12 flat buns and a bunch of little rolls.
  4. I added cheese to the little rolls once they had risen
  5. Bake in a preheated 400 degrees F (200 degrees C) oven for 12 to 15 minutes.

I keep trying to make cheese buns like what I can buy in the store with cheese that you pull apart and taste ever so yummy.  Hoping these will do the trick.

End result:
The boy (age 11) devoured, “adding they need more cheese, and better than the store mom”
Hubby said “good buns hun, better than store bought”  
Me: Enjoyed them.. both with and without cheese, though the ones without cheese seemed a tad flat (probably cause I made them smaller than they should have been) 

Linked up at 
Hip Homeschoolers. 
Turn it up Tuesdays.
  

Filed Under: Uncategorized Tagged With: bread, recipes

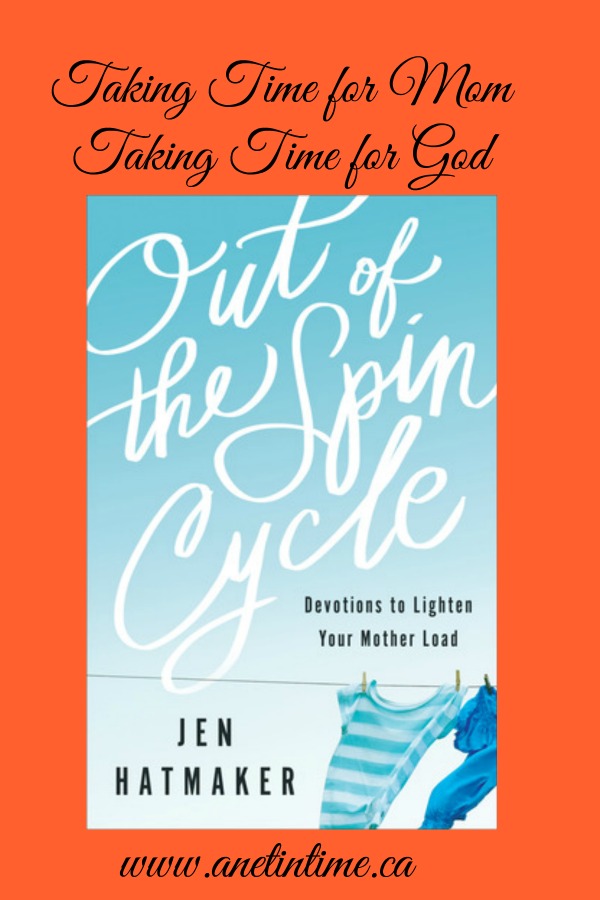
Review: Out of the Spin Cycle

January 10, 2017 By Annette1 8 Comments

40 Devotionals awaiting to lighten your load as a mother.   

Jen Hatmaker writes with humour and real-life stories to bring truth to bear, and a heart bent to hold a struggling momma close.

This book is a hand up to mommas, teaching what is most important.   Knowing the hearts of our children and turning those hearts toward God.

More important than laundry.
More important than getting it all right.
More important than healthy children (as in no medical issues)
More important than doing everything for them.

Teaching them to see God’s heart in the life of their mother.

And teaching momma that she doesn’t have to do it all or know it all, all she really has to know is… the heart of the God who made her. 

Some of  the devotions have a bible passage at the start, others have the passage mixed within the devotional.  The passages seemed like they fit as opposed to be taken out of context (pet peeve of mine).   Each devotion has a least one question to help the reader think through the thought presented AND a step of action.

One step out of the spin cycle call to action was this “Think of a concrete way to teach the character of Jesus today. Find a way to demonstrate his love, his presence, his joy or his protection“. 

Recommend it?   Yes. I didn’t see anything that caused me to raise my eyebrows or set my spirit a questing after truth.   If you need some encouragement and truth spoken into your life, this book may be just what you are looking for.

Title: Out of the Spin Cycle – Devotions to Lighten Your Mother Load
 Author: Jen Hatmaker

Pages: 175
Type: Christian Devotional
Style: paperback 

Reviewed for Nuts about Books

Amazon.ca: Out of the Spin Cycle: Devotions to Lighten Your Mother Load
Amazon.com: Out of the Spin Cycle: Devotions to Lighten Your Mother Load

Filed Under: Uncategorized Tagged With: Book Review, Books for Adults, bread, Christian living, christianity, Review

Book Club: Miss Peregrines Home for Peculiar Children

January 5, 2017 By Annette1 4 Comments

Lori and Wendy do a book club where they discuss a new book every month.  I thought it would be fun to join them (and did so last month with the book of negroes).

This month we looked at Miss Peregrine’s Home for Peculiar Children.   I have to admit, I almost decided not to join in, as my first introduction was the movie and I thought .. I’m not sure I want to read what I saw in the movie.  Some things in the movie just didn’t work for me all that well.  🙂

Anyways, decided to man up and give it a try.  The book is quite different from the movie and I urge you to give it a try.

LitLovers provided the questions, I, of course, provided the answers.  🙂

1. What effect did the photographs have on how you experienced this novel? In fact, what was your reading experience of Miss Peregrine’s Home for Peculiar Children? How did it make you feel? Were you disturbed…or fascinated…or something else?  Did the book hold your interest?

I thought the photos were interesting to view.  It didn’t bother me to look at them, it just raised questions in my head of….these look real, there must be an explanation to them, I wonder what it is.

I had a hard time separating how things went in the movie and how they were written in the book.

2. What’s wrong with Jacob Portman? What’s his problem?
As I read the book I didn’t think there was anything wrong with Jacob.  He was a kid who believed one thing about his grandpa, had his dad (over time) convince him Grandpa was a great storyteller, and then learned that Grandpa hadn’t been telling stories and he had to adjust to that truth and the truth of who he was.

3.
What about Abe Portman, what kind of character is he? What kind of a
world does he create in his stories for young Jacob? Why do the stories
intrigue Jacob so much?

Abe was a man caught between a rock and a hard place.  Knowing he had to stay in his own world and time and not be in the world of others.  Loving his family yet knowing he couldn’t be totally honest with them and never truly understood.

4. As he moves into adolescence, why does
Jacob begin to doubt the veracity of his grandfather’s stories? In what
way does he think they may be connected to Abe’s struggle under the
Nazis?
see the above.

5. What makes Jacob think his grandfather’s death is more sinister than what the official version claims.
Jacob saw something in the woods.  Something he knew to be real, yet it made no sense to anyone else.  

6.
Talk about the house in Wales. When Jacob first lays eyes on it, he
observes that it “was no refuge from monsters, but a monster itself.”
Would you say the house serves as a setting to the story…or is its
role something else—a character, perhaps?

Hard one to answer.   I think it serves as a good opening point. A big let down, and then a point of excitement and conversation.  

10. Talk, of course, about the peculiar children. Which of their oddities and personalities do you find most intriguing?

I thought the boy with the bees most intriguing.   To imagine having a whack of bees around you that can be peaceful or dangerous. I couldn’t see much use for the girl with the mouth behind her head… novelty yes, but then you can’t see what you are eating, there goes part of the joy of partaking in food.  Floating…wow.. HUGELY inconvenient most of the time I would think. 

12. In what way can this book be
seen as a classic quest story—a young hero who undertakes a difficult
journey and is transformed in the process?

I saw it as a coming of age.  Of a boy realizing the truths of his childhood were also the truths of his maturity.  That was important for him to learn.  To take of the mantle of his family.  That is what maturity does.  Doesn’t always take the same form… should move a family forward… but needs, in some way, to be done.

13. Does the end
satisfy? Are loose ends tied up….or left hanging? This is the first
book of a planned series. Will you read future installments? Where do
you think Riggs will take his readers next?

I most likely will not read additional books.  I only managed to get 2/3’s of the way through this book.  Hubby read it and enjoyed it and would happily read more in the series.  I just couldn’t this month separate the movie from the book and have felt mentally distracted much of the month.

 Amazon.ca: Miss Peregrine’s Home for Peculiar Children

Amazon.com: Miss Peregrine’s Home for Peculiar Children (Miss Peregrine’s Peculiar Children)

Linking up below

https://3gigglygirlsathome.wordpress.com/2017/01/05/miss-peregrines-home-for-peculiar-children-book-club/

Filed Under: Uncategorized Tagged With: Book Club, bread, Review

  • Page 1
  • Page 2
  • Go to Next Page »

Primary Sidebar

ABOUT ME

I am centered by the love of God and family. Smiles are brought about being a Writer, Poet, Hiker and reader. Growth occurs as I educate my son, raise him up in the fear of the Lord, love up on my critters and live as a pastor’s wife.

Want to Stay Informed?

Subscribe and I’ll shoot you an email once a week.


Thank you!

You have successfully joined our subscriber list.


Recent Posts

  • A Shift in Perspective
  • Affording Emergencies
  • Obey God Not Man
  • Just a Phase
  • What Route Should I Take?

Recent Comments

  • Annette1 on A Shift in Perspective
  • Annette1 on A Shift in Perspective
  • Sandra K. Stein on A Shift in Perspective
  • Tami on A Shift in Perspective
  • Annette1 on A Shift in Perspective

Archives

Categories

  • Art
  • Art Books
  • Blogging Helps
  • Faith
  • Homeschooling
  • Poetry
  • Recipes
  • Reviews
  • Uncategorized
  • Writing

Footer

Amazon Affiliate information

A Net in Time is a participant in the Amazon Services LLC Associates Program, an affiliate advertising program designed to provide a means for us to earn fees by linking to Amazon.com and affiliated sites

Tinker Crate Affiliate

Copyright © 2026 A Net In Time. All rights reserved. All text, photographs, artwork, and other content may not be reproduced or transmitted in any form without the written consent of the author. A Net In Time · Lifestyle Pro - Child Theme On Genesis Framework · WordPress · Log in