• Skip to secondary menu
  • Skip to main content
  • Skip to primary sidebar
  • Skip to footer
  • Home
  • About Me
    • Privacy Policy
    • Disclaimer, Legal and Media Kit
  • Blog
  • Contact me

A Net in Time

Curriculum and book reviews, faith, homeschooling and more!

  • Art
  • Blogging Helps
  • Faith
  • Homeschooling
  • Poetry
  • Recipes
  • Reviews
  • Writing

hands-on learning

Recipe: Banana Apricot Muffins

May 9, 2017 By Annette1 2 Comments

This is a recipe of my own creation!  Imagine that!   I looked at a few recipes for bananas and apricots and too many had ingredients I didn’t have in the house.   So I decided to try my own hand at it and to my delight they turned out well. ๐Ÿ™‚

Ingredients
2 eggs, beaten
2 ripe bananas, mashed 
1/2 cup apricots, cut into small pieces
1/4 cup oil

2 cups flour
1 tsp salt
3/4 cup white sugar
1 tsp baking soda

Directions
1. Mix first four ingredients together in a separate bowl.
2. Mix last four ingredients together in a separate bowl.
3. Make a well in the dry ingredients, then add the wet ingredients, stir until decently combined but not completely.
4. Makes 12 muffins cooked in a 350 oven for 20 to 25 minutes. 

Our Thoughts: 
 Mine – YAY!!   They turned out!
Justin – They’re good mom!
Hubby – Good muffins, good job hun.

document.write(”);

This post may contain affiliate links – using affiliate links from A Net in Time helps fuel this blog and our homeschool – thank you!

ยฉ2006-2017 A Net In Time. All rights reserved. All text, photographs, artwork, and other content may not be reproduced or transmitted in any form without the written consent of the author. A Net In Time/

Filed Under: Uncategorized Tagged With: hands-on learning, recipes

Review: Millennium Falcon, Star Wars Builders

May 6, 2017 By Annette1 16 Comments

My lad has been waiting for .. what seemed to him like forever…until we could build this lovely kit that came our way via Raincoast Books.   Little did he know I had an agenda.

First… work through his Apologia Astronomy book and read through the book on Pluto. Now admittedly he’s not completely done with the apologia study (but he’s close), but he’s got a cold, it’s a blah rainy day and I thought.. why not today!  So that’s what we did. ๐Ÿ™‚  We opened up the kit Star Wars Builders Millennium Falcon.  Oh my, did the lad have fun!

What do you get?
This kit comes as a complete unit, a box attached to a book.

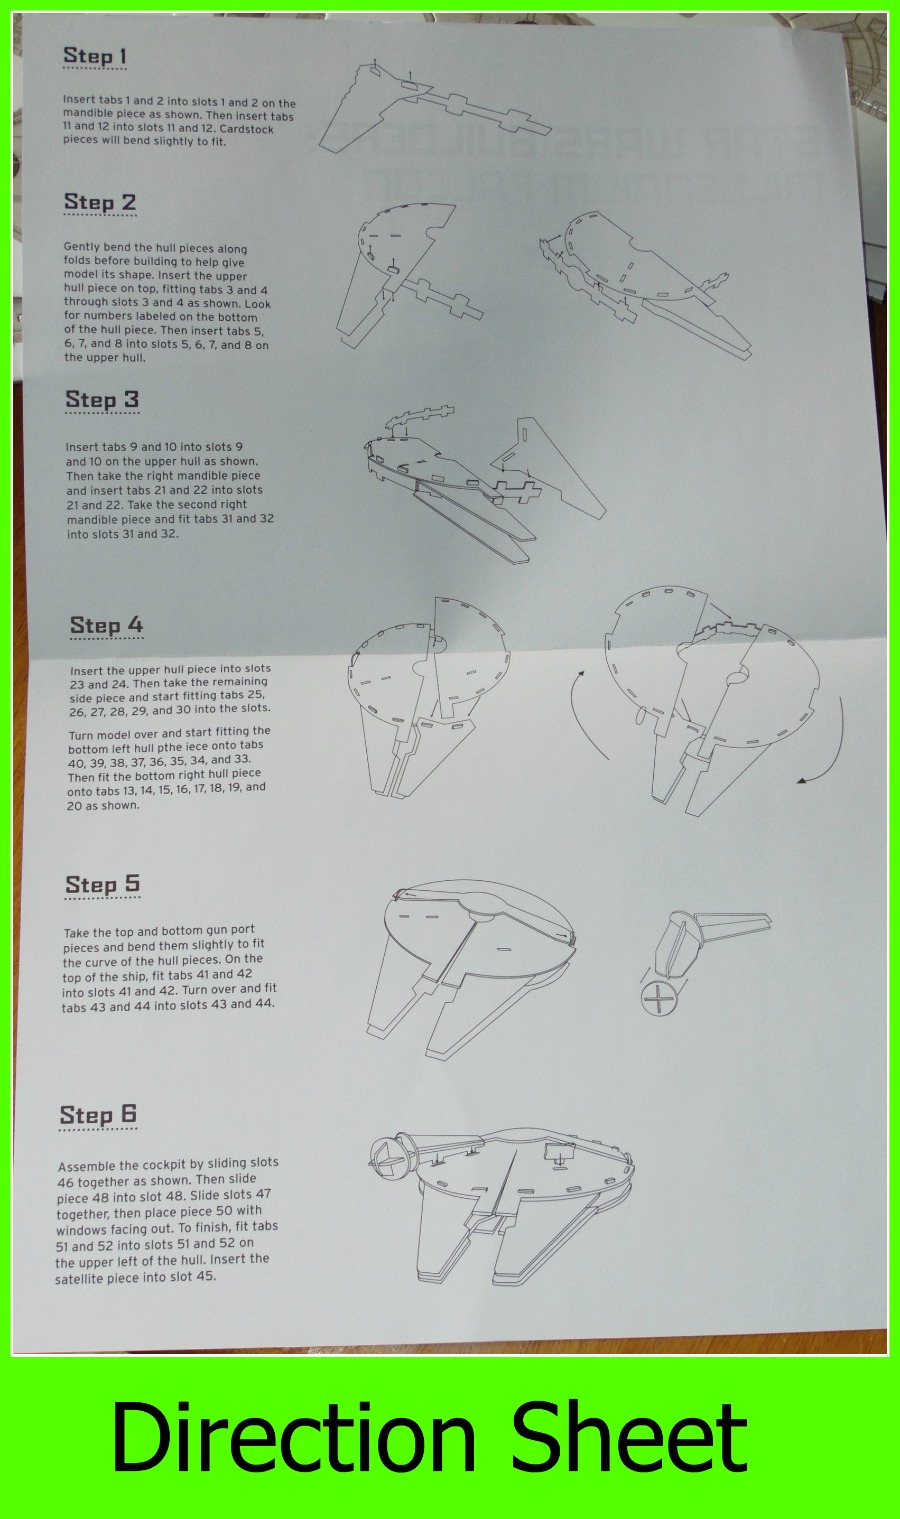
A clear direction sheet that has instructions on both sides. One to show the numbering, the other to show how to put it all together. 

The book is a nice one with good quality paper and full colour pictures throughout.  The text appeals to a variety of ages.   64 pages of good information for the Star Wars fan. 

The build is made of cardstock that is very thick and sturdy.   It has layers in it, but they are held together well and do not separate when putting it together.  One piece buckled a little when being bent to form the curved lines…but that was more a learning how much pressure needed to be applied.  It did not affect the integrity of the finished product.

An easy to put together 3-D puzzle.   Follow the instructions or it won’t go together well.

My Thoughts

I have to admit that it was hard to not want to do the build myself or to offer help.  I contented myself with reading parts of the book out-loud to my lad and asking him how he thinks it reflects real life (as movies are supposed to reflect life right?).   It was enjoyable to listen to his thoughts.

New Horizons is a real spacecraft from Pluto Mission

Concern:
 
I
can’t say the box is very sturdy as it came to us ripped although it
was in secure packaging and taped closed. None of the pieces were damaged as they were
tightly packed, a good bit away from any damage to the box.  So I can’t say the damage was really worth anything, just spoiled the initial look of the kit is all it did.

My Son’s Thoughts:
My son loved this.  Oh my!  He had fun building it.  He thought it was one of the best builds he’s ever done.

Kit Synopsis: 
Discover what makes the Millennium Falcon the most famous ship in the Star Wars
galaxy with this awesome master builder kit! Featuring a 64-page book
detailing out some of the ship’s most daring adventures and introducing
members of the crew, Star Wars fans will enjoy learning more
about one of the most legendary starships in the galaxy. When fans
finish the guidebook, they can follow the included instructions to build
their own to-scale replica Millennium Falcon with the included cardstock model pieces. It’s everything Star Wars fans need to begin an adventure in the galaxy far, far away. 

Where can you find it?

 Amazon.ca – Star Wars Builders: Millennium Falcon

 Amazon.com – Star Wars Builders: Millennium Falcon

Just so you know.. if you want to teach your child astronomy, SchoolhouseTeachers is having a sale right now AND it’s an really great sale.  The sale price for the monthly membership is $9.95, and the sale price for the yearly membership is $99.   Not only can you take the everyday astronomy course but you can use all the interactive elements of the World Book Encyclopedia.   AND you could even make Hans Solo’s Sound Blaster!

This post may contain affiliate links – using affiliate links from A Net in Time helps fuel this blog and our homeschool – thank you!

ยฉ2006-2017 A Net In Time. All rights reserved. All text, photographs, artwork, and other content may not be reproduced or transmitted in any form without the written consent of the author. A Net In Time/

Filed Under: Uncategorized Tagged With: Book Review, Books for Children, Books for Middle School, Books for Upper Elementary, child-led learning, hands-on learning, homeschool, Review

Art Class, Different than One-on-One

May 4, 2017 By Annette1 6 Comments

 Over this past year I tried to get my homeschool co-op to come out to my place to do a bi-weekly art lesson with the lad and I but…no one came out.  I guess they thought the half-hour drive was too much to bear.   I wanted to do an art class because doing art as a group is much different than doing art one-on-one.

So when it came time to do our spring co-op again I thought, I’m going to do an art class.

We had FUN!   I did a class on Zentangles and I have to admit.. it was BY FAR the easiest class I have ever done for co-op.

Grab the book: Zentangle: The inspiring and mindful drawing workbook with over 70 practice tiles

Grab a bunch of children.
Set them down with some paper and pencils and watch them go.  Seriously.. we had fun.
My job?   Simple.
Give some basic instruction first day… see.. look at these different zentangles.  This one is called ____, that one is called ______.  Practice a few of them.  We practiced on 2 x 2 squares of paper.

My job?  Offer encouragement, show what you can do different… if you space the lines farther apart or turn the tangle upside down.  “AH!!!”   one boy said.. “I can turn it into wheat!” while a girl said “I can make those vines into ropes if I add some twisty lines”.

I LOVE THAT STUFF!   Seriously.  I do not consider myself artistic.. I hated school and having to all do the exact same thing when doing art.  HATED IT.   But I do have a knack for taking ideas and presenting them to children and then seeing them literally FLY with it.   I LOVE THAT.

For week two I asked them.. what do you want to do?  Do you want to practice more on the 2 x 2 sheets OR would you like to see what you can do with objects?     Objects it was, so I brought in a variety of half sheet images.  Some pokemon, some birds, some puppies etc.   Things I thought the children might be interested in..and let them go to work.   I just pulled up free colouring pages from on-line, resizing them to fit the page.

This proved to be what the children wanted to do.   Fill in images and make their zentangles, or doodles with a purpose, practical.

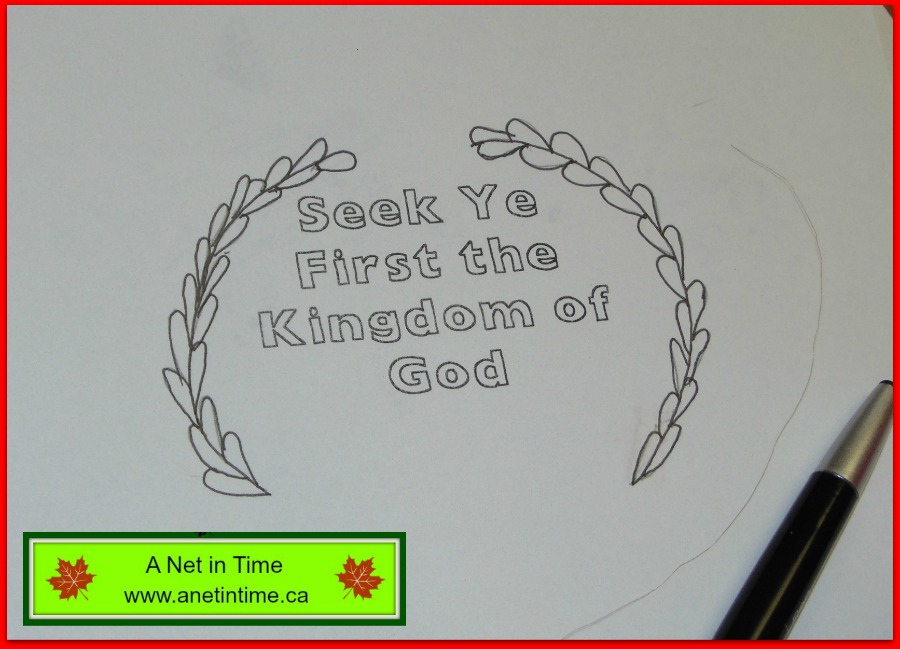
I quickly discovered one young lady had an affinity for doing bible verses.  Her mom told me how delighted she was that I allowed her to do what she wanted to do and didn’t make her do what the others were.   This picture is partially done.  She did another one that was much bigger and filled with hearts around the John 3:16 verse.  Simple and well done.

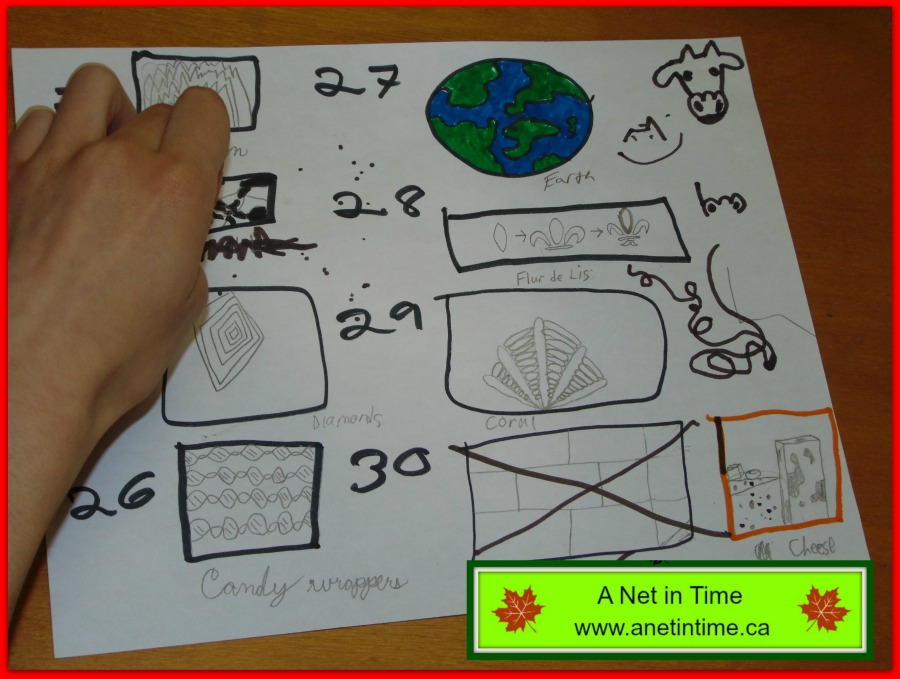
Another young lady turned out these amazingly well done drawings.   She hopes to turn them into a book and maybe sell them.   I told her she had the skill to do so.

 Another young lady tried her hand at making her own outline and then filling it in.  Isn’t she doing an great job?  I was so proud of her and pleased with her work.

My young fellows weren’t really keen on me taking pictures of them working.   In fact one refused, so I went with it.  ๐Ÿ™‚  We did careful behind the scenes pictures.  I’m not supposed to let it be too big, but pleased I was with their work.   For their final project white shirt did a zentangle with french symbols to be filled out, and striped shirt did a series of intricate lines inside a pokemon figure.

This young lady learned to fit the zentangle drawings to the outline she was using.   By the time she had this one finished, it would have been a joy to colour in and see all those sweeping lines.   Not just done in pencil, but in fine tipped marker as well.

The bulk of the class was just me doing around and saying well done, have you thought about using this idea?   Oh.. I like how you added some blockiness to that, or see how the lines sweep here?.. what kind of doodle do you think will fit well there?    Encouragement along with different images to fill.. it was just an easy, laid back class filled with laughter and beauty.  

 Didn’t they do an excellent job?  I was so immensely pleased with all of them.  It was amazing to see their different styles?   A couple of the children made “cheat sheets” for themselves, choosing zentangles they particularly liked and putting them on a sheet.

This post is part of the Homeschool Crew Art Round up.  It will probably open up on Friday morning.

This post may contain affiliate links – using affiliate links from A Net in Time helps fuel this blog and our homeschool – thank you!

ยฉ2006-2017 A Net In Time. All rights reserved. All text, photographs, artwork, and other content may not be reproduced or transmitted in any form without the written consent of the author. A Net In Time/

Filed Under: Uncategorized Tagged With: Art, blog link, hands-on learning, HOPE, TOS

Recipe: Rice Cheese balls or Arancini

May 2, 2017 By Annette1 4 Comments

 So the other day I had cooked up a bunch of rice cause I wanted to make some rice pudding.  I over estimated how much I would need (what can I say… I can do the math but my cold-fogged head messed up).  Anyways, I had a whack of rice and wanted to lessen the amount of leftovers.  (ever been there??).

I found Five Easy Recipes that use leftover rice and made what I call rice cheese balls, but what they call Arancini.

Ingredients:

  • 2 cups cooked white rice, cooled
  • ยฝ cup grated Parmesan
  • 1 egg
  • 8 small cubes fresh mozzarella – if using store bought mozzarella let it sit out for a bit to get warm and soft.
  • 2 eggs
  • 1 cup Italian-style breadcrumbs
  • Oil, for frying
  • 1 cup marinara sauce (didn’t use)

Directions:
1. Place a large pot over medium heat, adding enough vegetable oil to rise 4 inches in the pot.

2. Combine the rice, Parmesan, and 1 egg in a medium bowl. Use your
hands to thoroughly combine the mixture. 
3. Whisk together the remaining 2 eggs in a small bowl.
4. Measure the breadcrumbs into a small bowl.  I did not need the 1 cup, could probably get away with 1/2 cup.
5. Take a small portion of the
mixture, forming a ball around a cube of mozzarella. 
6. Dip each arancini in the eggs and then in the
breadcrumbs, shaking off any excess.  NOTE: to do this I placed each round on a spoon and then spooned the egg over top of it, turning as necessary.  DO NOT dip them.. they will completely fall apart on you.  Then roll them in breadcrumbs.
7. Once the oil reaches 375 degrees
Fahrenheit, add 2 or 3 of the breaded arancini to the pot, frying them
until golden brown and cooked throughout.

8. Use a slotted spoon to remove the fried arancini from the pot and
transfer them to a paper towel-lined plate. Immediately salt the
arancini. Repeat the frying process with the remaining arancini.  I did not salt them but I dislike excess salt, hubby found it unnecessary, your tastes may vary.

If you want, dip them in the marinara sauce.
If you are like hubby – seafood sauce is really great with them, or ketchup, or dijon mustard.  Threaten to scarf down all nine balls lovely wife made.  ๐Ÿ™‚
If you are like the lad and mom – no sauce necessary..just eat up and enjoy and look for seconds.  ๐Ÿ™‚

They are best served warm.

document.write(”);

This post may contain affiliate links – using affiliate links from A Net in Time helps fuel this blog and our homeschool – thank you!

ยฉ2006-2017 A Net In Time. All rights reserved. All text, photographs, artwork, and other content may not be reproduced or transmitted in any form without the written consent of the author. A Net In Time/

Filed Under: Uncategorized Tagged With: hands-on learning, recipes

Review: ArtAchieve

May 1, 2017 By Annette1 4 Comments

Imagine taking an art class in the comfort and freedom of your own home… professional lessons, art lessons for children, provided by ArtAchieve.  I don’t know if you remember that the lad and I reviewed this last year, and were delighted to review for ArtAchieve again, this year broaching the Entire Level III.  Boy.. has it been fun.  ๐Ÿ™‚

One of the things I love, after various conversations with John, is how he holds true to his statements.
He believes anyone can learn to draw, that it is not a skill only for the talented but for anyone.  It’s a necessary skill that improves one’s abilities in many other subjects. He structures his lessons in such a way that if you want to learn to draw a cat, your cat will LOOK like a cat.  ๐Ÿ™‚  At the same time, he leaves plenty of room for creative self-expression, so the cat you draw will be YOUR cat, not his, not your neighbours, but all yours.   Learning to draw means paying attention to what you are observing, it means thinking creatively which spills over to other subjects.  Doing art helps you cover history, geography, literature and more.   I know it has helped us in our Canadian Studies!  ๐Ÿ™‚

Come.. explore ArtAchieve with us, won’t you?

Once you have logged into ArtAchieve you will be brought to a page with all your lessons.

Each lesson, if you click on the (+) sign opens into usually four sections.

The way you approach the lesson influences which version you use.  My son wasn’t keen on the video as he needed to stop and start it all the time.   He would rather not do that.  He quickly learned that the powerpoint version worked best for him.   One slide at a time with little dots below that he could shift between.  He could quickly skip ahead to see the final result or he could jump a few buttons back to review that he did a step properly.

The son was busy.. ever so busy with having fun about the armadillo as a turtle rabbit.  I raise rabbits so he was bugging me about how many some of them might want to become turtles so I better watch out for turtle rabbits. AND DON’T get him started on the German.. oh my!!!!    11 year olds and their sense of humour eh?  We could just see those little armoured turtle rabbits running around.  It just made us laugh together. ๐Ÿ™‚  Each lesson John adds these “curriculum connectors” as I call them, where he gives some of the history of the animal used, or the art form involved.  He throws in history, geography, science and what not.  Art is such a cross-curricular subject and it just neat to see the Cross Curricular Connections he makes.

Each lesson starts off the same (except for the stop action lesson at the end of level three).  A line drawing to complete (so you can practice drawing the parts of the subject matter) and a supplies list.  You can also find a supply list for all the lessons under supplies when you login, though I found it wasn’t as complete as the in-lesson supply list.

We ran into one lesson where we didn’t have the acrylic paints needed so I emailed John to find out how necessary they were or if we could make do with oil or tempura paints, or if pencil crayons might work as well.   He said “Go ahead all those will work”.  ๐Ÿ™‚  So we did.   I just love art programs that are accommodating as that’s how I approach art! I figure what is important.. the medium or the learning the style taught?   Granted, if a lesson is about HOW to do work with pastels.. well..then you want to use pastels.  But this lesson was about how to do form lines and plain lines so the materials used didn’t matter quite as much.

Each lesson contains a different art lessons, whether about form lines, working in 3rds, or working with different mediums like glue and aluminum foil.    The art lessons are short and illustrated well.  

The lad and I finished two projects.  We worked through them slowly as that helps my perfectionist son take the time that needs to do a job well.

For this project we were supposed to draw an armadillo.
But the lad wanted to do a pokemon character and I thought
I’d try a cat.   The lad helped with the cat feet as I was struggling with them,
I helped the lad with curving the leaves of his Oddish.
The lad thoroughly enjoyed this project once he saw it finished!
This totem project was a time-taker.  
We did one section at a time to draw, doing the black form lines went quickly.
The lad was hesitant about doing the colour, until he started
and then he figured out how he wanted it to go.

One of the things I really appreciated was how John showed us different options for how a finished project might look.  Sometimes they were quite different from each other but it drove home how different people do can do the same art project and have it turn out completely differently.  It gave the lad the freedom he needed to do his OWN art. We talked alot doing each art piece, discussing methods, colour, types of pencils, marker yes or not, how to make easy lines within a colour (use white crayon!) and so much more.  We learned alot about the Pacific coast people.  Here’s a bit we learned while doing our totem poles.
In fact we actually have a problem… we don’t agree on which project we should do next… should it be the frog (the lad) or the Canada geese (me)?   We can put a Canadian spin on both you know?  ๐Ÿ™‚

I have to admit, I’m looking forward to when we do the Canada Goose lesson, check out some of the Cross Curricular Connections we’ll be able to do.   We’ll be able to visit websites to learn facts about geese, do a character study via youtube, read good books about geese, and more.  I can see us looking up Canada Geese migrating and perhaps finding out why some geese stick around all winter!  You find this under the art lessons tab.

If you are intrigued by ArtAchieve I strongly urge you to try out the free lesson!  See for yourself if John’s way of teaching works well for you.  ๐Ÿ™‚  Really.. you won’t regret it!

Vendor: ArtAchieve
Product Name and Links: Entire Level III

Cost For Level Three: Individual Lesson $6 each, bundles of three for $16, or the entire course for $58.50
Received: One Year of Level III.

100 of us are reviewing John’s great art program.  Click here to read more (or the image below).     The other levels are: Entire Level I , Entire Level II and Entire Level IV

http://schoolhousereviewcrew.com/art-lessons-inspired-from-around-the-world-artachieve-reviews/

Social Media Links:
Facebook: https://www.facebook.com/Artachieve   @ArtAchieve
Instagram: https://www.instagram.com/johnahofland   @johnahofland
Twitter: https://twitter.com/ArtAchieve   @ArtAchieve
Pinterest: https://www.pinterest.com/artachieve   artachieve
Google+: https://plus.google.com/+JohnHoflandartachieve   ArtAchieve

Hashtags: #hsreviews  #artachieve, #artlessonsforkids, #homeschool #artclassesforkids, #drawinglessonsforkids

This post may contain affiliate links – using affiliate links from A Net in Time helps fuel this blog and our homeschool – thank you!

ยฉ2006-2017 A Net In Time. All rights reserved. All text, photographs, artwork, and other content may not be reproduced or transmitted in any form without the written consent of the author. A Net In Time/

Filed Under: Art, Uncategorized Tagged With: Art, Canada, child-led learning, hands-on learning, homeschool, Review, TOS

Recipe: Sweet Rolls

April 25, 2017 By Annette1 2 Comments

 I had never made sweet rolls before so I thought I’d give it a whirl.  I chose this recipe as it looked quite doable in the course of one day and some looked too complicated for a first go round.    It made far more than I thought it would.  Next time I will need to make them in a 9 x 13 pan.  (instead of three small round pans).

Ingredients:

1/2 cup milk
1/2 cup  sugar
1 1/2 tsp salt (can get away with less)
1/4 cup butter, melted
1/2 c warm water
2 pkg dry yeast
2 large eggs, beaten
2 cups flour (first amount)
up to 2 1/2 cup flour
additional melted butter for brushing on tops of baked rolls.

Directions:
  1. Scald
    milk (bring just to a boil and remove from heat immediately.(1 minute in microwave works too) Stir in
    sugar, salt, and butter. Set aside and allow to cool to lukewarm.  
  2. In a large bowl mix warm water and yeast. Stir until dissolved. Stir in
    lukewarm milk mixture, beaten eggs, and half the flour. Beat until
    smooth.
  3. Add remaining flour gradually, mixing as you go. You may need a bit more
    or less than the total 4 1/2 cups called for in the recipe, depending
    on the humidity and other factors. Your dough should be elastic and
    slightly stiff but not dry.

  4. Turn dough out onto a floured board and knead until smooth and very elastic. This usually takes 8-10 minutes.
  5. Butter the inside of a large mixing bowl. Put dough in bowl and turn
    dough over a couple of times to coat it all with the butter.
  6. Cover bowl and place in a warm place so it can rise. It will take about
    1 hour to double in bulk. At that time punch dough down and turn out
    onto a lightly floured board to shape.

  7. Pinch off about 2-3 tablespoons of dough and shape into a ball. Place
    each one in a buttered muffin tin or baking pan, barely touching each
    other, do not crowd rolls.
  8. Cover prepared rolls and allow to rise in a warm place until doubled in
    bulk, again about 1 hour. Rolls should now touch each other. (A little
    more rising will occur during baking.)

  9. Preheat oven to 375 degrees when rolls are about 10 minutes from being ready for baking.
  10. When ready to bake place rolls in oven and bake for 20-25 minutes. They
    should be browned nicely and smell so good and yeasty! Brush tops of
    rolls with melted butter immediately when removed from oven. Allow rolls
    to set for at least 10-15 minutes before eating.

 NOTE: if you make a ring…cook it for less time they came out a bit dark being in as long as the rest of the rolls. 

This post may contain affiliate links – using affiliate links from A Net in Time helps fuel this blog and our homeschool – thank you!

ยฉ2006-2017 A Net In Time. All rights reserved. All text, photographs, artwork, and other content may not be reproduced or transmitted in any form without the written consent of the author. A Net In Time/

Filed Under: Uncategorized Tagged With: bread, hands-on learning, recipes

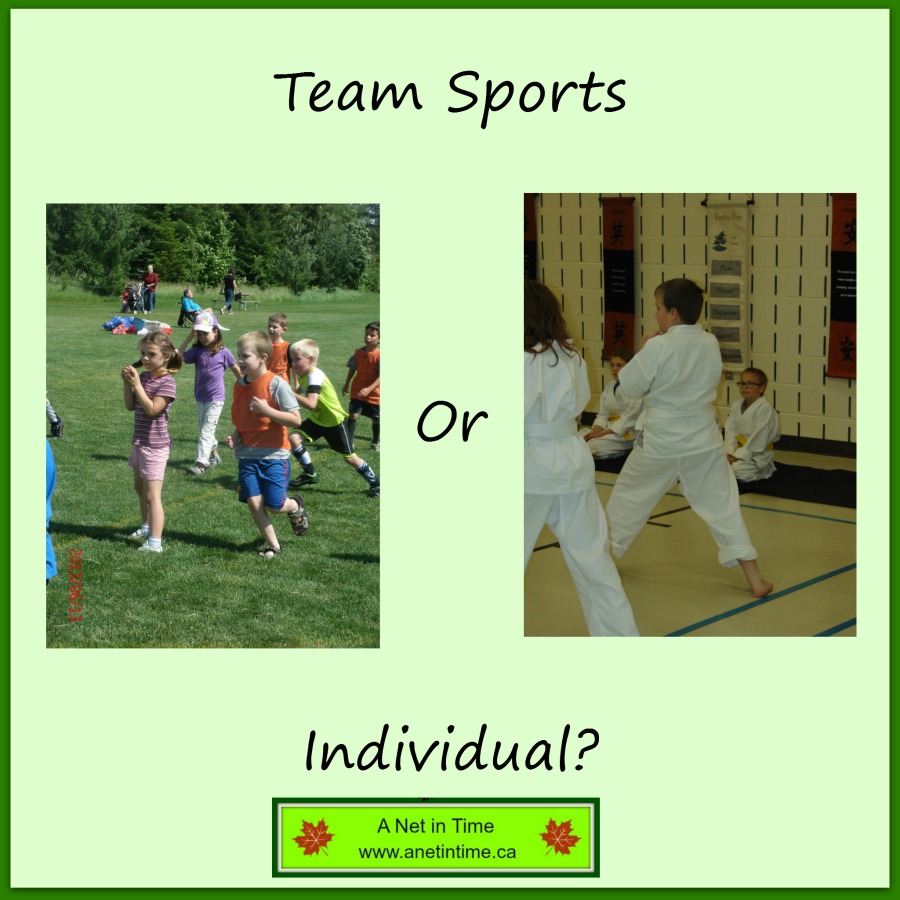
Team sports…. or individual… which works?

April 25, 2017 By Annette1 12 Comments

 I don’t know if you are like me and not really into “doing phys ed”, so while I understand the importance of getting busy physically it’s not high on my list of priorities.  How is it for you?

I admittedly bought into the hype that children HAVE to take part in team sports because it’s good for them. Don’t get me wrong.. team sports are good for most kids, they really are! I felt like I was doing poorly by my lad if I didn’t get him into a team sport.

Therefore I put some effort into getting my lad interested in doing some type of team sport.

We tried homeschool soccer.   And admittedly there were points of success, but also had points of extreme dismay in my lad.

We stuck it out for a couple of years and the final year for soccer had my lad more interested in the toads and frogs in the local pond more than the soccer… so we called it quits.  ๐Ÿ™‚

Swimming worked a touch bit better, but not a whole lot.   Having ear troubles didn’t help the matter at all.   The end result was that my lad does know how to keep himself afloat in the water and that’s a good thing.  Perhaps with time he’ll become a more proficient swimmer… but first to fix his ears!

Then we discovered that we had a local karate club so I sweet talked my cautious lad into doing a couple of trial classes…. and HE WAS HOOKED!    He likes karate so much that he’s now has his orange belt and is looking forward to testing for his advanced orange belt.

Another love the lad has is archery!   He and his dad go out whenever they can.  A local fellow has a club with erratic lessons…but a willingness to let the boys go out and shoot arrows.

I have learned something important through all of this… my lad has a distinct fondness for individual based sports.  Where he can think his way through it, learning the steps in karate, perfecting his form in archery.  These things appeal to him.   Will he sometime down the road like team sports?   I don’t know, I’ll leave the door open for it though….but right now…  I have a boy having fun doing sports that he likes, and I call that…Phys Ed.  ๐Ÿ™‚

For other posts on the general theme of health and physical education, check out Canadian Homeschool bloggers eh?   Post goes live on the 26th.

Also linking up here eh?

This post may contain affiliate links – using affiliate links from A Net in Time helps fuel this blog and our homeschool – thank you!

ยฉ2006-2017 A Net In Time. All rights reserved. All text, photographs, artwork, and other content may not be reproduced or transmitted in any form without the written consent of the author. A Net In Time/

Filed Under: Uncategorized Tagged With: blog link, child-led learning, hands-on learning, homeschool, Phys Ed, Physical Education

  • « Go to Previous Page
  • Page 1
  • Interim pages omitted …
  • Page 6
  • Page 7
  • Page 8
  • Page 9
  • Page 10
  • Interim pages omitted …
  • Page 13
  • Go to Next Page »

Primary Sidebar

ABOUT ME

I am centered by the love of God and family. Smiles are brought about being a Writer, Poet, Hiker and reader. Growth occurs as I educate my son, raise him up in the fear of the Lord, love up on my critters and live as a pastor’s wife.

Want to Stay Informed?

Subscribe and I’ll shoot you an email once a week.


Thank you!

You have successfully joined our subscriber list.


Recent Posts

  • A Shift in Perspective
  • Affording Emergencies
  • Obey God Not Man
  • Just a Phase
  • What Route Should I Take?

Recent Comments

  • Annette1 on A Shift in Perspective
  • Annette1 on A Shift in Perspective
  • Sandra K. Stein on A Shift in Perspective
  • Tami on A Shift in Perspective
  • Annette1 on A Shift in Perspective

Archives

Categories

  • Art
  • Art Books
  • Blogging Helps
  • Faith
  • Homeschooling
  • Poetry
  • Recipes
  • Reviews
  • Uncategorized
  • Writing

Footer

Amazon Affiliate information

A Net in Time is a participant in the Amazon Services LLC Associates Program, an affiliate advertising program designed to provide a means for us to earn fees by linking to Amazon.com and affiliated sites

Tinker Crate Affiliate

Copyright © 2026 A Net In Time. All rights reserved. All text, photographs, artwork, and other content may not be reproduced or transmitted in any form without the written consent of the author. A Net In Time ยท Lifestyle Pro - Child Theme On Genesis Framework ยท WordPress ยท Log in