• Skip to secondary menu
  • Skip to main content
  • Skip to primary sidebar
  • Skip to footer
  • Home
  • About Me
    • Privacy Policy
    • Disclaimer, Legal and Media Kit
  • Blog
  • Contact me

A Net in Time

Curriculum and book reviews, faith, homeschooling and more!

  • Art
  • Blogging Helps
  • Faith
  • Homeschooling
  • Poetry
  • Recipes
  • Reviews
  • Writing

hands-on learning

Recipe: Braided Easter Bread!!!

April 14, 2017 By Annette1 Leave a Comment

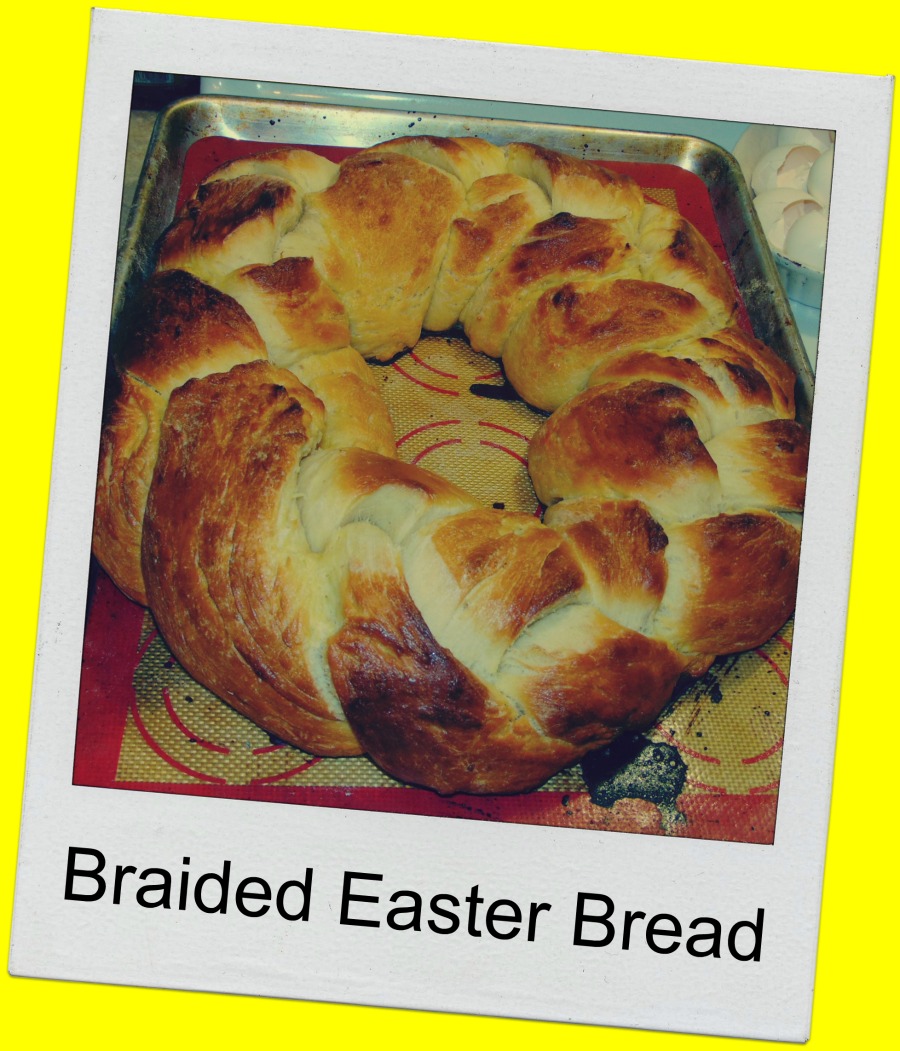
CHECK IT OUT!!!   Man, this was HARD to do.  I’ve never braided bread before so this was totally a new thing to try.  I figured since I was getting confident making bread that bumping my skills up a level might not be a bad thing to try and braided breads always look rather cool.

You can find the original recipe here: Braided Easter Bread.
Ingredients:

6 cup all-purpose flour

2 tsp baking powder

1 Tbsp sugar

ยฝ cup warm water

2 Tbsp yeast

1 cup milk

ยพ cup honey

1 Tbsp salt

2 Tbsp butter

zest of 1 orange

5 eggs

2 egg yolks

2 Tbsp water

1 Tbsp honey


Directions
1. Mix 1 tbs sugar with ยฝ cup warm
water and sprinkle in the yeast. Let sit until frothy, about 10 minutes.
Combine the 1 cup milk, ยพ cup honey, 2 tbs butter, 1 tbs salt &
orange zest in a sauce pot, bring to a simmer and them remove from heat.

2. In a large mixing bowl, whisk the 5 eggs
and then add the yeast mixture followed by the milk mixture. In a
separate bowl, mix the baking powder into the flour. Incorporate the
flour into the wet ingredients one cup at a time until the mix forms a
large wet dough. Place the dough in a large bowl that has been greased
with vegetable oil, cover with plastic wrap and leave to prove in a warm
place for 2 hours.

3. After the dough has proved, turn it out
on a floured work surface and knead the dough for 10 minutes, until the
dough is elastic. If the dough is too sticky, fold in a little more
flour.

4. Divide the dough into three equal pieces
and roll each piece into a long thread. Lay the three threads out about 2
inches apart on a greased baking tray. Pinch the three threads together
on one end and then braid them together, folding each thread over the
other, alternating as you go. When you reach the end, pinch the three
threads together. Brush the dough with vegetable oil, cover with plastic
wrap and let rest for 15 minutes. Set the oven to 375F.

5. Combine 2 egg yolks with 2 tbs water and 1
tbs honey and brush the bread with the egg wash. Let sit for 5 minutes
and then brush a second time.

6. Bake the bread in the oven at 375F until golden brown, for about 30 minutes.

My Struggles:

I couldn’t figure out how to roll the dough.  I think I had too much flour on it. But I couldn’t get it roll worth a diddle, as I ended up squeezing the dough into a long tube mostly.  There must be some trick to rolling dough… thoughts???
It also turned out way too long for the pan I have which is why I turned it into a circle. 
 
What did we think?
Well.. I’ll have to update this recipe later. We haven’t tried it yet as I made it for Good Friday.  ๐Ÿ™‚ 
Though hubby’s response when he saw it was “wow…. looks good hun, smells good too!”, then “did you hide anything in it?” Silly fellow. ๐Ÿ™‚

This post may contain affiliate links – using affiliate links from A Net in Time helps fuel this blog and our homeschool – thank you!

ยฉ2006-2017 A Net In Time. All rights reserved. All text, photographs, artwork, and other content may not be reproduced or transmitted in any form without the written consent of the author. A Net In Time/

Filed Under: Uncategorized Tagged With: Cooking, hands-on learning, holidays, recipes

Recipe: Honey Lemon Rabbit Pasta

April 9, 2017 By Annette1 Leave a Comment

 I thought to try something new.   Note that rabbit can be exchanged for chicken very easily in this recipe eh?  

Ingredients:
 1.5 lbs of rabbit, boneless, cut into bite-sized pieces.
1 tbsp olive oil
Lemon Pepper Seasoning

1/2 cup honey
1/4 cup lemon juice
2 tbsp olive oil
1/2 tsp salt
1/4 tsp pepper
1/2 tsp thyme (or two or three fresh sprigs) 
1 tbsp apple cider vinegar
1 tbsp lemon pepper seasoning

8 oz angel hair pasta

Directions:

1. Get pot boiling for pasta
2. In a large measuring cup mix together honey, lemon juice, 2 tbsp olive oil, salt, pepper, thyme, apple cider vinegar and lemon pepper seasoning.   Mix well and let set.
3. Season rabbit with lemon pepper seasoning, be generous.  Cook rabbit in a large skillet with the 1 tbsp olive oil until 90% done.
4. Add the mixture that you set aside.   Let heat through while the angel hair pasta is cooking.  
5. Once the pasta is cooked through (about five minutes to cook through) add it to the cooking rabbit and mix well.  
6. This meal is best served warm but I will suggest that you let it sit covered for 5 minutes before serving, giving the sauce time to flavour the pasta well.

Verdict:
Me: I LOVE THIS DISH.. so glad I took a chance with it.  ๐Ÿ™‚
Hubby: I wish I were feeling better…the bit I tasted was good but I can’t eat more.
The Lad: One moderate serving followed by a much larger serving.  “I like this mom, can you make it again please?  It was really good!”

This post may contain affiliate links – using affiliate links from A Net in Time helps fuel this blog and our homeschool – thank you!

ยฉ2006-2017 A Net In Time. All rights reserved. All text, photographs, artwork, and other content may not be reproduced or transmitted in any form without the written consent of the author. A Net In Time/

Filed Under: Uncategorized Tagged With: hands-on learning, recipes

HomeMade Tortillas!

March 31, 2017 By Annette1 6 Comments

So guess what I made tonight!!!   I know, I know, you probably guessed it from the post title eh!  ๐Ÿ™‚       Homemade tortillas.      I’m telling you how much I like tortillas and have wanted to find a way to make them cheaper than buying them.  Hubby found this recipe for me…it is so easy and so yummy.  ๐Ÿ™‚

AND THEY TASTED GOOD!!!!

So here’s the recipe, it’s super simple.  Original recipe here.

Mix together Two cups flour, 1/2 tsp salt, 3/4 cup water and 3 tbsps of oil. 

Knead that mixture for a good 8 minutes, adding flour or water as needed to make a smooth elastic dough.
Let it rest for 10 minutes. 

Divide into 8 sections, roll each section out as thin as possible, a minimum 7 inch circle.

Cook over a medium burner on a non stick pan with cooking spray.   1 minute each side (you want them LIGHTLY browned).

Keep them warm.  Makes 8 servings.

Easy to make, tastes yummy too!  ๐Ÿ™‚

Tonight we used them wrapped around shredded beef with corn niblets.   MMMMM.. …  ๐Ÿ™‚
I can totally see cutting them into pieces and using them with a dip, or with mmmm.. melted cheese. ๐Ÿ™‚

This post may contain affiliate links – using affiliate links from A Net in Time helps fuel this blog and our homeschool – thank you!

ยฉ2006-2017 A Net In Time. All rights reserved. All text, photographs, artwork, and other content may not be reproduced or transmitted in any form without the written consent of the author. A Net In Time/

Filed Under: Uncategorized Tagged With: bread, hands-on learning, recipes

Progression in an Art Project

March 23, 2017 By Annette1 6 Comments

So I finished my art project a while back but haven’t done up a post to tell you about it.   Today is that day as I sit huddled in a cuddle blanket because baby it’s cold outside.  ๐Ÿ™‚

I started this project with the high hopes that my lad would join in and make one of his own, but the method and the medium where just too different for him to wrap his head around, so I made it sitting next to him as he worked on his own project.  This gave me the opportunity to say.. so this is what I am doing now.. what do you think?   Or do you think if I do this it might work?   This proved to be a really really good thing to do.  He gave me some great ideas as well.  ๐Ÿ™‚

I started off drawing a generalized picture of some mountains.  My son had started a pencil sketch of the mountains at the same time. 

I then started to layer some tissue paper over my drawing, folding it in to create mountain peaks, layering over top of each to hopefully create depth and shading.  All my tissue paper came from gifts or wrap that some stores use when you buy clothes from them.   The brown paper came from a book review.  Each layer was modge-podged well together and left to dry between episodes.

As you can see the mountains gradually came together.   I even showed my lad a quick way to add a touch of colour and he was quite surprised at how easy it was. 

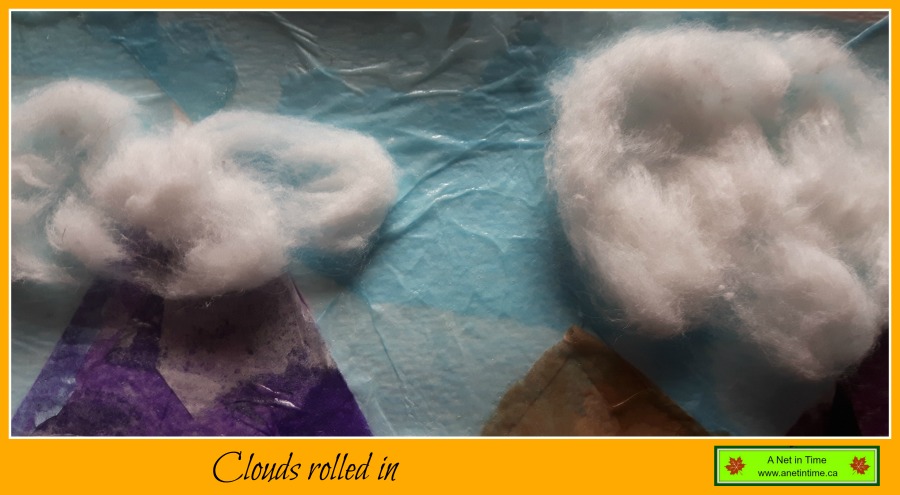
Since this was a work in transition I wasn’t quite sure what I really wanted to do with it.  I knew I wanted some texture and colour and to make something unique to peak the interest of my lad, so when the mountains where done I added some green trees (just triangles of tissue).  Then I got the brainstorm of adding some clouds that were fluffy.   Oh my…You should have seen the surprise on my boys face!!   Then he said “MOM!   That works!   Can I do one too?”

We talked about whether we should leave them white or experiment with how we could turn them into black rain clouds, but the risk was we’d wreck them so the risk was rejected.
 
The trunk caused a bit an issue for me.

I wanted to find a way to add some texture as my thought was to have the trunk pop out a bit… like seeing a tree in the foreground and having the background fade away behind it.

I tried laying tissue paper.. looked horrible and I thought “OH NO!!   It’s been ruined!!!”  But then I got to thinking I could cover up the horribleness with twisted strands of tissue paper.   And it worked!   

You should have heard the lad…. “Mom.. I really like that.  You did a better job doing that then the other paper. “

He helped me cut the limbs for the top of the tree.  He volunteered to help me out with this.   Having the limbs hang out over the edge of the paper was his genius at work.
 

 The canoe.. oh my….

This was HARD to do.   We tried a number of things to make a realistic canoe and nothing really worked.  I finally looked for a canoe picture and VERY carefully cut it out, then traced out a canoe bottom and glued that together.

Then I added a piece of foam to the bottom to make it stand out from the bottom.   The lad chose the location and then we were done. 

Dad pronounced it well done and the lad WILL NOT let me remove it.  It stays on display in the bookroom and it makes me smile.  ๐Ÿ™‚

This abstractly, see how it does art, was just so much fun to do and made for much conversation twixt the lad and myself.  I LOVE IT!!!  (the smiles it brings to me as I think back over it).
 
So what fly by the seat of your pants art have you made lately?  

Going to link this up at Kym’s and Charleen’s Art Post thing they have going on.   

This post may contain affiliate links – using affiliate links from A Net in Time helps fuel this blog and our homeschool – thank you!

ยฉ2006-2017 A Net In Time. All rights reserved. All text, photographs, artwork, and other content may not be reproduced or transmitted in any form without the written consent of the author. A Net In Time/

Filed Under: Uncategorized Tagged With: Art, hands-on learning

Draw & Discover by Yasmeen Ismail

March 15, 2017 By Annette1 4 Comments

 I have a DELIGHTFUL series of books for you to learn about today.  Draw and Discover books by Yasmeen Ismail.   Each book has it’s own theme from emotions, directions, or even perspective. 

I have got to walk you through these books that are geared for the younger crowd! 

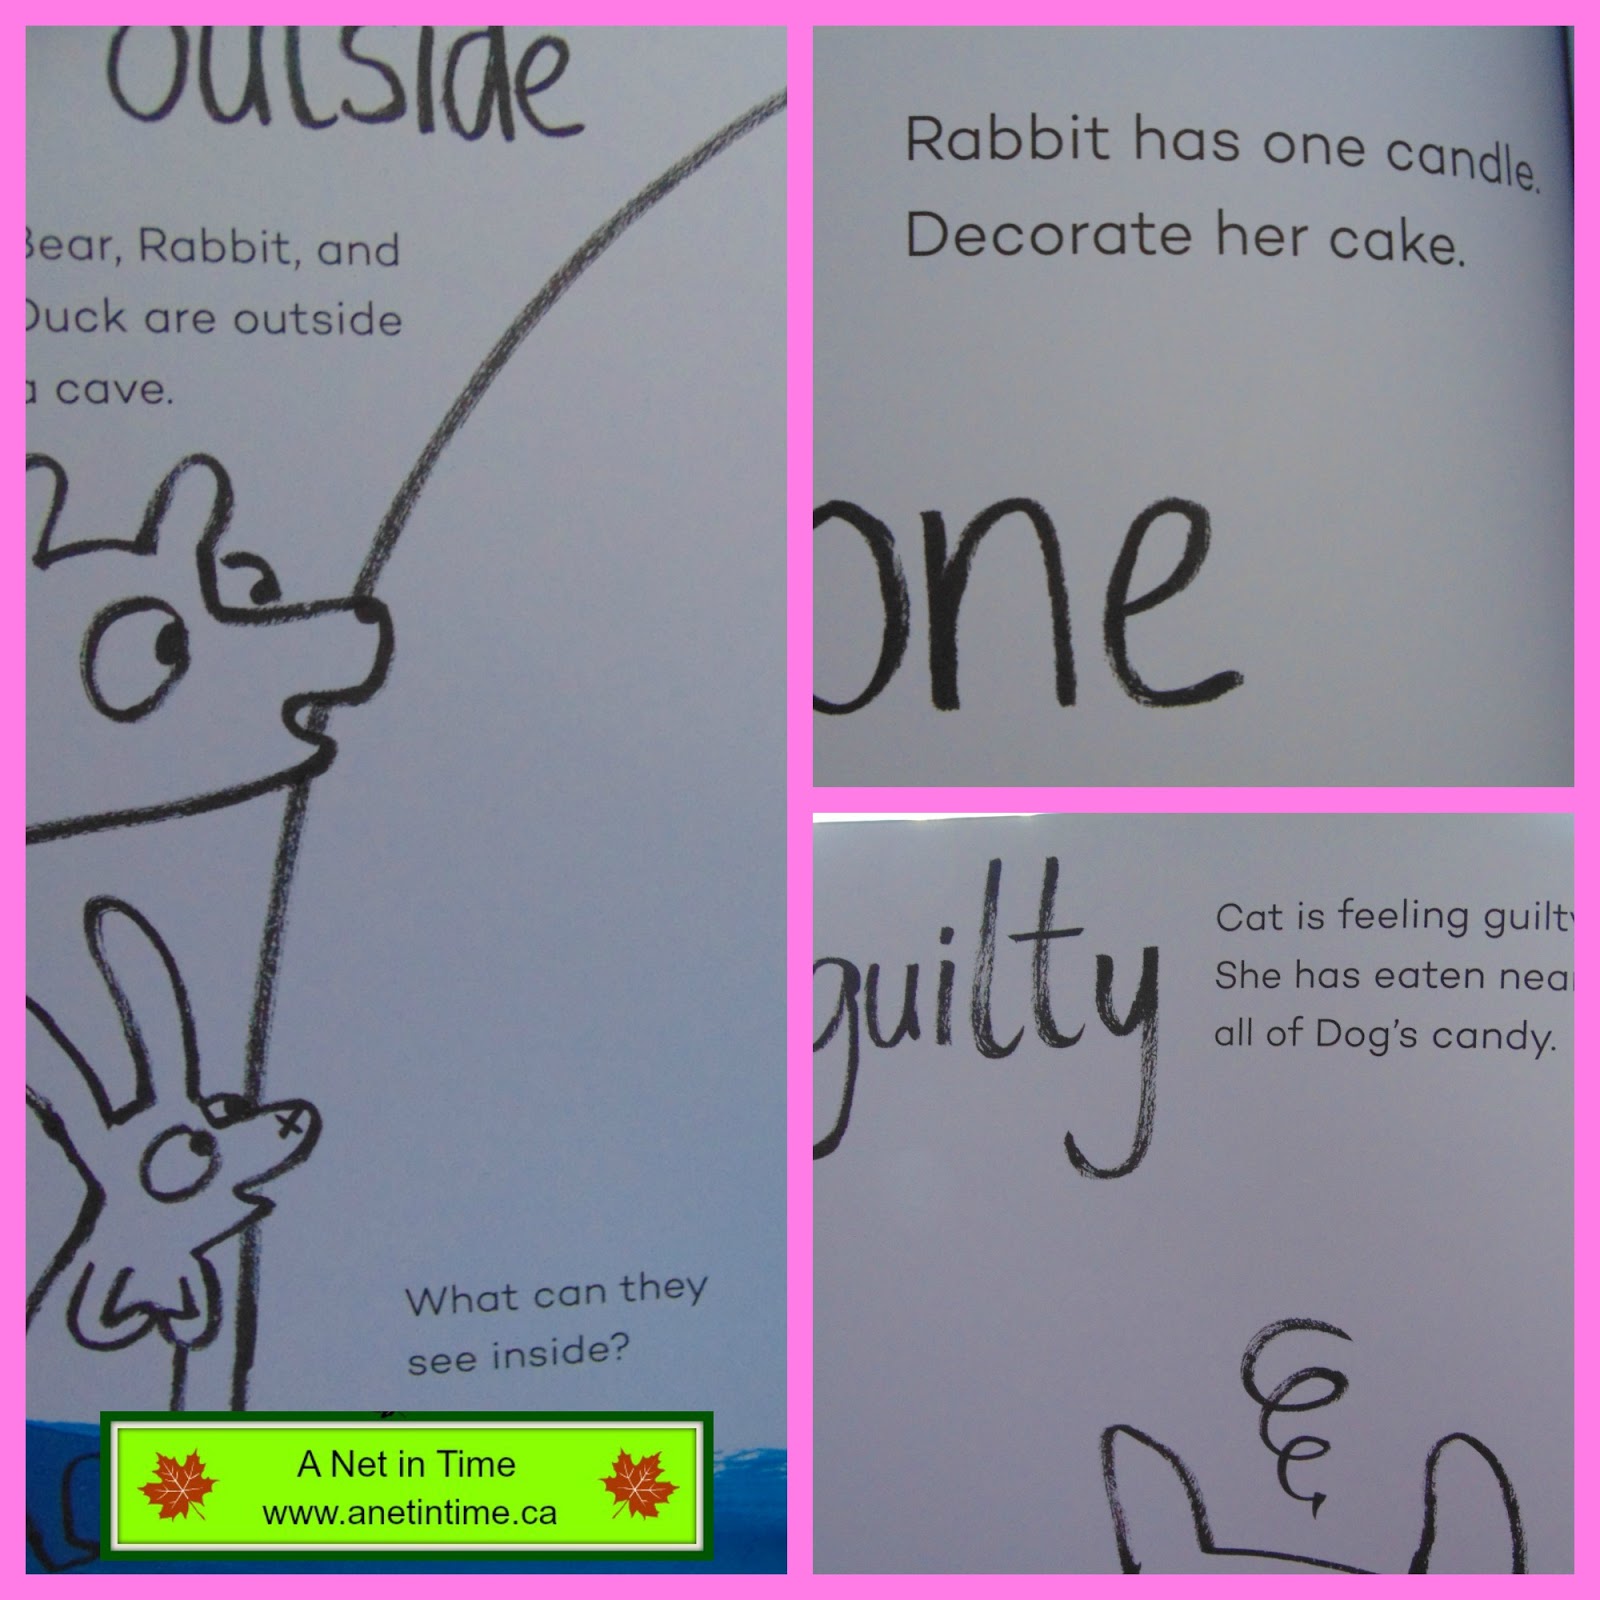
One of the aspects of these books that I like is they use simple drawings and text to allow children the freedom to explore the meaning of a word using whatever they want to draw to do so. ๐Ÿ™‚   Great paper… a thicker quality that will resist leaking through, ripping, and multiple pencil erasures.

 
The pages leave plenty of room for drawing and colouring. 

There is so much room given for children to express their creative side while learning new words.     Why not use art to help teach?

Each book is 56-64 pages long with a two page spread to help explore a single emotion (excited, sad, proud etc), or opposite words (up/down, push/pull etc). 

If you have a singleton child it is definitely a use it up as you go book, or if you have multiple children, you could use it as a springboard to developing your own pages.

Each book has a hard fly (front and back)that could be used as a book mark or a “put behind the page” sheet to prevent leaking of paint or markers to the next page.
That fly contains all the words used within the book as well, making it a good “let’s look ahead page” or a “let’s review what we’ve learned page”. 

The three books are called:
  
Happy, Sad, Feeling Glad.  Cat and Dog lead the way of exploration.
Inside, Outside, Upside Down.  Bear, Rabbit and Duck are the guides.
Push, Pull, Empty, Full.   Rabbit, Duck and Bear show the way.

All published by Laurence King.   Geared for ages 4-7 years old.  56-64 pages long.  
Everything in these books is designed to get children thinking, doodling, drawing, colouring and learning.   An innovative series by a remarkable children’s author: Yasmeen Ismail.
 

This review is part of an Art series is part of an on-going series of Art books reviewed for your pleasure and resource.    You can find more books here and here. 

Filed Under: Uncategorized Tagged With: Art, Art Books, Art Series, Book Review, Books for Children, hands-on learning, Review, Series

Five Advantages in Learning to Cook

March 8, 2017 By Annette1 4 Comments

What can I say.. I’m finding it rather nice to see my lad working in the kitchen.

I’m kinda bad though…he’s cooked with me off and on throughout the years and about a month ago I just said “you’re cooking one night a week”.  Just kinda threw him into it.

He’s missed a week when we’ve been away.  But he’s taken to it like a duck to water.  Making poutine, hamburgers, Spaghetti and meatballs with dad, along with pulled pork and mashed potatoes.(again with Dad).

Realizing all his skills are coming into play.

1. Practical use of Education

  •  Reading…he has to follow directions.  Sometimes reading and re-reading the directions for making something,  (like tonight with the ribs).
  • Math.. figuring out the 1.4 litres was 1400 ml, and having Dad show us how to do that on the scale. 
  • Geography works for some meals (like learning poutine was originally French Canadian.
  • Science…it’s cooking!   The interplay of ingredients that make pudding!  Who would think it!!!  ๐Ÿ™‚  Sauces to keep meat moist.  Flour, sugar, oil and more makes cake.

2. Learning how to run appliances 
 … like the electric mixer, the hot oven, a microwave, and toaster oven. Learning what different implements are called like a baster, a siphon, a salad spinner etc. He’s developing important skills AND the confidence to use them without hands on support. 


3. Learning how to ask for SPECIFIC help.  Not just “help me now mom!” But rather “Mom, I need help getting these ribs out of the oven cause they keep sliding on me and I think they will fall off”.   And “Dad, how do you cook hamburgers?   What do I push to start the bbq?”

4. Coming up with ideas on what makes for a good meal.
    Tonight he added chocolate mousse to the menu.   He originally only wanted to  have poutine but I asked “Do I cook only for myself lad?  What do I do if I know that someone doesn’t like what I am making?”  After a quick I don’t know he thought and said “you make something that I like too”. Therefore he needed to ask questions about what I might like with the poutine.   He came up with ribs and chocolate mousse.

5. Skills for the future.
Like every parent, my goal is that my son will be able to take care of himself as an adult.  To know how to cook is a big part of that.  It will be good for him to know how to make more the pizza or sandwiches (though one can live on that).   If he learns how following instructions gets him a good product in the end….isn’t that worth something?

Here’s just one more.
Just maybe I am working myself out of a job!   ๐Ÿ™‚

What advantages do you see in children knowing how to cook.

Filed Under: Uncategorized Tagged With: child-led learning, hands-on learning, homemaking, homeschool, Science

And it was good! Our week Feb 19-25

February 27, 2017 By Annette1 4 Comments

We planned a bit of a short week this week.   Plans to go away this weekend, a vehicle in need of repair, and knowing the learning takes place in many different ways.  ๐Ÿ™‚  School happened!   Life happened.  And it was good!  ๐Ÿ™‚

Monday 
Today was family day, so the lad did his minimal schooling that he does on days off, and off we went to first take part in a demonstration Karate Class and then to go for a walk at the Pinery.   We did some pokemon going while we are there, toured through Grand Bend and just hung out together.

Tuesday 
Ice experiment…ooh.. fun with matches!

The lad made cake!
It was his turn to cook, he saw the cake in the cupboard and his eyes…. oh my, they just lit up!   “It’s my turn to cook!    Let’s have cake!”

He was a bit downcast when I mentioned that just cake for supper was not acceptable… which led him to ask for helped in making perogies.

Dad, not being a lover of perogies opted to make himself some other dish instead.

Wednesday 
Food bank.   Regular schooling.  The lad pushed hard and was done by 1230.  ๐Ÿ™‚  
Had a lovely walk together in the afternoon the lad and I did.   New Pokemon out and running around, so we had to chase them down.  ๐Ÿ™‚

Thursday 
School, the lad’s report this week on the Caribou.
Garbage day, lovely weather, car work to do… we called it done as early as we could. ๐Ÿ™‚

The lad helped clean the cars out and helped dad work on the rear brakes.   They also fixed the side mirror that I accidentally broke off after over correcting from someone taking a corner really wide.   (I avoided being hit but the car mirror…not so much).

Rabbit picture taking day.

Friday 
Gramma coming over since hubby and I are heading out for the weekend.   
The lad did practical schooling today making cheese buns.  ๐Ÿ™‚  He’ll also be doing animal husbandry and housework with gramma this weekend.   

Saturday-Sunday
Hubby and I just schleped around together.    We had a wonderfully relaxing weekend doing absolutely nothing but wandering around together, looking and talking and just being alone without distraction.

Faith and Word Prompts
Set your face against Mount Seir.   Devotion on Ezekiel 35
Sunday sermon.  Can you build the church for others?
A Wife‘s Understanding of God.  chapter two of excellent wife book
You Will know that I am the Lord.   Devotion on Ezekiel 36:1-15
Forgetting the Holiness of God. Devotion on Ezekiel 36:16-24
For His Name’s Sake.  Devotion on Ezekiel 36:22-37
Pajamas are Optional.   word prompt post on pajamas
Oh to be Slow.  World Prompt on the word Slow.
  
Reviews
Earth-Space Colouring Book.
Conspiracy of Silence.

Jack London and the Klondike Gold Rush. 

A Dog’s Purpose.

Homeschooling and Life
ABC Blogging.  F is for frogs.  Frogs with tails.. think on it.   ๐Ÿ™‚
Art Series: Earth-Space Colouring book. Cool resource for astronomy lessons.
Hymn Study: Have thine Own Way Lord.  
Chicken Heart Casserole. 
Books for Canada, the Canadian North (Jack London).
STEM: Building a Robotic Hand.
The Lad’s Research: The Caribou.

Linking up at the following Places:
 
Homeschool Highlights.
Family Friday Link Ups:
Weird Unsocialized homeschoolers: Weekly Wraps Up.
Homeschool blog and tell.

Filed Under: Faith, Uncategorized Tagged With: A day/week reviewed, blog link, Cooking, hands-on learning, history, Hymn, Music, Vacation

  • « Go to Previous Page
  • Page 1
  • Interim pages omitted …
  • Page 7
  • Page 8
  • Page 9
  • Page 10
  • Page 11
  • Interim pages omitted …
  • Page 13
  • Go to Next Page »

Primary Sidebar

ABOUT ME

I am centered by the love of God and family. Smiles are brought about being a Writer, Poet, Hiker and reader. Growth occurs as I educate my son, raise him up in the fear of the Lord, love up on my critters and live as a pastor’s wife.

Want to Stay Informed?

Subscribe and I’ll shoot you an email once a week.


Thank you!

You have successfully joined our subscriber list.


Recent Posts

  • A Shift in Perspective
  • Affording Emergencies
  • Obey God Not Man
  • Just a Phase
  • What Route Should I Take?

Recent Comments

  • Annette1 on A Shift in Perspective
  • Annette1 on A Shift in Perspective
  • Sandra K. Stein on A Shift in Perspective
  • Tami on A Shift in Perspective
  • Annette1 on A Shift in Perspective

Archives

Categories

  • Art
  • Art Books
  • Blogging Helps
  • Faith
  • Homeschooling
  • Poetry
  • Recipes
  • Reviews
  • Uncategorized
  • Writing

Footer

Amazon Affiliate information

A Net in Time is a participant in the Amazon Services LLC Associates Program, an affiliate advertising program designed to provide a means for us to earn fees by linking to Amazon.com and affiliated sites

Tinker Crate Affiliate

Copyright © 2026 A Net In Time. All rights reserved. All text, photographs, artwork, and other content may not be reproduced or transmitted in any form without the written consent of the author. A Net In Time ยท Lifestyle Pro - Child Theme On Genesis Framework ยท WordPress ยท Log in